Please note that this page is for reference only. Which is running notes from the Youtube Playlist Dhruvin Shah trainer. Thank you.
Canvas - UI driven
Model - Data driven
Dataverse
develop back office system
OOTB view, forms, defining BPF in OOB manner, 100% responsive UI.
exg: HR onboarding process, HR recruitment process, device ordering system.
2. Licensing and Tools required for MDA.
Active PowerApps License
Space to create dataverse table
Powerautomate license to create BPF.
-------------------------------------------------------------------------------------
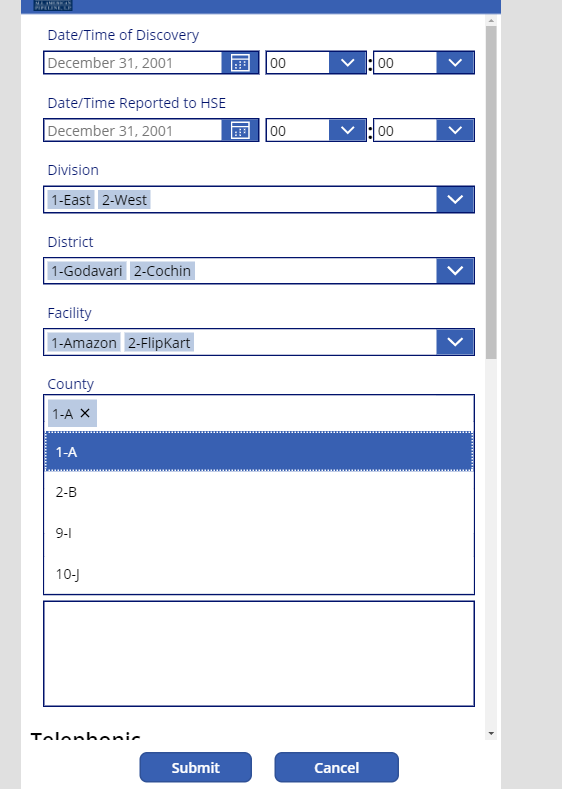
3. HR onboarding process App
HR add employee information
IT admin create account
Manager assign project
On Day1>Employee complete onboarding process
Create dataverse table according to this sheet
Create Solution first. name: Employee Onboarding Process
Create Table
Data->Tables->New Table
Add New ->Designation Table
add columns like Name-text, Expirence-Whole number,
Descrption-Textarea
click on tab->Data-> Add record, entry some records or data.
Create another table->Employee Onboarding.
EmployeeName-Text
Designation-lookup->from Designation Table. Relationship is created as Many to one.
Save it.
Calculated Field
We are adding interviewdate+30days as Date of Joining.
All columns
4. Customize Views in DataVerse tables for MDAPps
Go to Designation Table, Go to Views
Active Views
right side sort by->Asc order Designation Name field
Filter by->Status is 'Active'
add required columns to the view +View Columns button
Save it.
Employee Onboarding table->
Active Views
Add columns required ones like
------------------------------------------------------------
6.Customize Form
Designation Table->Form
We can see main form
click on it
left side we can see Components
Table Columns
Tree view
Form Libraries.
Form Settings on top->Security roles, Form order, etc..Fall back form.
Right side form properities, Events->Add libary: we can add JS libraries.
In tree view General section
In middle section I wiant to add some columns so go to Table columns and add.
Now to create form for EMployee Onboarding Table
Go to Forms->We can see Generals ection, name it as Employee Basic Information, add columns
Now I want new section which is two column layout
Add new section->Interview Details
Add fields-> Custom fields filter->add columns related to interview
Go to components->Add subgrid->Choose Designation and Active designation form,
We can add other tabs as well like IT admin.
Go to components->click on "1-column tab"
Click on New tab->IT Admin
New Section->Add columns related to IT admin
Go to components->click on "1-column tab"
rename tab name as Manager
Go to new section-> add columsn related to manager
Go to components->click on "1-column tab"
Click on New tab->Day 1 employee activity
New Section->Add columns related to Day 1 employee activity
-------------------------------------------------------------------------
7.Business rule in Power Apps.
Employee Onboarding Table has No. leaves field and Employee Type.
Business Rules
Add New Business Rule
Based on Employee Type->No. of leaves will change.
permanent/contract employee has different no. of leave in their leave bank.
based on condition we can perform by set values.
set the field values in Yes condition and False condition
False condition, set field value as 12.
-----------------------------------------------------------------------
8.Create your first Model-Driven App with Power Apps
Create App->Choose Modern App designer
Name it as "HR Onboarding Process"
Classic view looks like this
First we have Pages, Navigation, Data
Navigation->Add Group and SubArea->
one limitation in modern view is we cannot create area. We have to switch to classic experiene to create area.
Create Area1
Create one Group under Area1
Inside Grop add one subarea.
In SubArea->we need to configure table, table name, title it, Description.
Also rename the group name as "Employe OB"
We can't define another area again.
Turn to classic view.
Site Map->overall architecture of dashboard.
Dashboard->
BPF->
Entity View section->Dataverse table view section.
Table, Forms, Views, Charts, Dashboards
In order to create another Area, Click on SiteMap
We can also rename Area name
Area (tab)->Group(1st header)->SubArea(child under header)
----------------------------------------------------------------------------
BFF in MD Apps
Flow->BPF->Create new flow
Name it and choose table name
New stage->
we have options like snapshot
Form we need to develop
1st HR filled
2nd IT admin
3rd Manager
4th New Joinee Employee
We need to define 4 different stages.
1st Stage is HR
Create Stage->Display Name Employee Information - HR
Components->Add another Stage->IT Admin
3rd Stage-> Manager choose entity name as "Employee Onboarding"
4th Stage->Onboarding Day 1 new Joinee
Stage 1-> Components
Data Step is already been added
We can also add
Data Step: Click on it
We need to add fields the set of fields which are required
Select Employee Name, Sequence to 1 and click apply.
we can also choose "required" enable/disable
Click on Plus and add another Data Step for another field.
and so on... for rest of the fields for HR form.
Step2:
Employee Onboarding-IT Admin step
We need to add properities like Data Step for this stage.
Add Data Fields.
For Manager
we have two fields
Business Unit, project information.
Employee Onboarding New Joinee Stage:
Once all fields are add, click on Validate and check for any errors or warnings.
Click on Activate the flow.
------------------------------------
Add BPF to Solution and in MDApp
Solutions->Employee Onboarding->Add BPF
When ever you create a BPF, behind a Dataverse is created and maintain the stages.
Query Dataverse and we can know at which stage our BPF is at?
MDApp->HR Onboarding Process open it.
BPF green button, Select our BPF which we created.
It will add one more row in Entity View.
Click on SiteMap, Add one more subarea
Employee Onboarding BPF select it and rename the group as Employe OB BF. Save and publish.
-----------------------------------------------------------------------
Now we need to build a Power Automate flow to send notification from one stage to another stage where end user can click on link to open the form directly.
------------------------------------------------------------------------
Send an email notification:
SOlutions->EPONboarding->CLick on Cloud Flow
Trigger: Dataverse, When a row is added, modified or deleted.
Choose Table and Scope: Organization.
Process Stage is a default table in our database.
Dataverse actions--> Get row by ID
Find the process stages table which is responsible for all the stage of BPF which is default one.
Row ID: from above stage, we need to pass its ID
We need to Get Row By ID
we need to find our employee onboarding tables row.
Choose Employee Onboarding table
We need to pass employee onboarding value
Add Control, Switch
Value should be "Process Stage Name"
From Process Stage table
Case:
Equal to "IT Admin"
Equal to "Manager"
...
..
Send Email Outlook action "Send and Email(V2)"
IT Admin will receive an email first with link.
deep link:
For manager email, we can keep our manager email as static or we can pass dynamic based on user field.
Day 1 New Joinee: Welcome mail received to the new joinee.
In order to send deeplink:
vRedirectURL
type as String
Initialization Value
Copy the entire URL first and pass to our flow in the variable
bu GUID which is an employee onboarding ID from the Get Data from EMP OB action.
we need to update like this.
-------------------------------------------------------------------
Add a Custom Page to Model-Driven Power Apps
1st Episod:
We will create one MD page with a custom canvas page inside the MD page.
click on the tile-> it will pass to item MD form.
2nd Episode:
Model ribbon with power fx code.
We can open Full page or Left pane kind of page using top ribbon links using Power Fx.
The above is exmp of center dialog
Power Apps component Framwork which is know as PCF component.
which is built for graphical representation, add them to canvas page is 2nd episode target.
-----------------------------------------------------------------------
Lets Begin Episode 1:
IT Help Desk is the MDApp
Which has two pages in the left side
Tickets Page
Home Page
In order to get started,
Create a Solution->IT Helpdesk
Dataverse table and Canvas app is developed inside IT Helpdesk solution->
IT Helpdesk is canvas app name to manage the everyday IT issues back by by Tickets table
Name: Desc column
Category: Hardware/Software
Priority:High/Low
Attachments field: with data type as "File"
Status: Not Assigned, Pending, InProg, Completed
Assigned to Name:
Assigned to Email:
Esitmated completed date: Which is of type DateOnly- It is for business rule.
Business rule is "Based on ticket created its completion date is after 2 days it will completed optional field."
Click on View->Active Tickets->Create the required view as below screenshot.
Main Form, we need to add below as screenshot.
End user wants canvas app, So created a canvas app
Screen1 has two buttons
Add and My Requests buttons
Lets move to main topic, Adding custom pages to MD Apps.
Open Solution-> IT Help desk-> We have Dataverse and Canavasp
Create MD App
Name it as "IT HelpDesk Admin"
We can add Page.
Table based View and Form
Select Table name "Ticket" it creates default view and form os ticket
Area1->Group1->SubArea1 and Tickets we can see
Rname Group1 as "IT HelpDesk"
Now inside this we want a canvas app as one more page
Click on Pages tab->Add new page-> Custom pages-> Create a new custom page or existing custom page->choose new custom page-> Name it as "IT -Grid" and click on Add
It will create a new canvas app experience in canvas page.
Only difference is, In canvas app, we have menu experience on top, here we need to add everything on the left navigation.
Add ticket data source in the page. Here in canvas page, we can find only dataverse table only due to MD apps supports dataverse only.
By default, this canvas pages not providing response layout.
We have responsive container to use the responsive layout.
Screen1-> Layouts->Container1->Set width and height as Parent.Width and Parent.Height
x and y as 0
rename it as MainContainer.
Add inside horizontal container and width as parent.width, height as 200 and x,y as 0
Add colour as blue and add label inside, lets provide header name inside the label as "IT Helpdesk 1.0" font colour, alignement to center.
We need to add plus icon as well at right side, add icon + and provide width 50x, font color as white, alignment strech, width as 90px.
add one more Horz container set its Parent.Width and parent.height, -Header Height.
Add Vertical Gallery Inside, data source as Tickets
WrapCount = set to Screen1.Size which is showing 4, It will bring to card shape.
TemplateFill = choose light color
template padding=10px
You can create single canv page only .
In order to create multiple page, settings=>display settings, => enable mutiple screens.
We have created canvas page, We need to open MD app how?
We need to use single line Power Fx code.
Code is basiscally navigate to yourself to the default form of ticket
OnSelect of Plus icon->
Navigate(Defaults(Tickets)) //It will redirect to new form.
Click on card, should go to edit form of the MD app form.
Gallery->Onselect-> navigate(ThisItem)
Save and Publish.
Lets add our custom page inside the MD App.
Go back to MD app
page not found need to included in mdapp and then republish.
Just republish it.
refresh preview
Play it.
It is responsive as well.
New button take to new form of MD app.
Click on a tile with take to edit form of MDapp
----------------------------------------------------------
Customize Command bar using Command Designer in Model-Driven App
*how to customzie cmmand bar,
*We can use pfx function, own js function use for open dialogues
*pass context from MD app to canvas app.
Prev we see context to navigate Canvs page to MDapp.
Now we need to custom command action.
Created a button called "PowerWrite"
It is kind of tool tip notification.
I want to open canvas app as a side pane page
Also Have created a Canvas page with PCF component.
OpenReport is a button on top ribbon, Allowing to open the canvas page dashboard.
Low code era of custom component - check out in another video.
Open Full Page button - It will load in full page.
Pass Model drive context to canvas page - Using command action and code we are righting in Jquery.
It will pass the context in query string.
Click on Area section which we created on three dots
Click on edit command bar
to add the new command, we can place the cursor and add new by click on +New command in left side and name it as "PowerFx" with adding icon, we can also add a tool tip with tool tip description, Action choose Run Formula and click on Open Formula bar on top ribbon OnSelect->Notify("Hello", NotificationType, Success)
We can also pass the context of selected row and add patch code which is another use case.
Two more concepts below:
Navigate to and from a custom page using client API
Navigate from a model page to custom page.
Creating Full page with out context.
Open as an inline full page with a record context
Open as a centered dialog
Open as a side dialog
Lets create new button
Click on +New Command
Rename it as "SideDialog"
add icon if you need
Action->Run Javascript
we need to provide javascript function.
We need to create a JS file first.
Open VS code editor
copy and paste the code
Open as a Side Dialog code from documentation
It is a code we need to add in to a function.
https://www.youtube.com/watch?v=6nWceaCxk7Y&list=PLib8Q64STW-tmeXSYh15nwYRroMszd8yO&index=15
var pageInput added script here
logical name of the page,
Go to SOlution-> Page Type
IT-Grid-1, copy the pagename and paste in the code
Go to Webresource->New->upload the file which we created CustomDialogFn
provide display name, Name, TYpe as JS and save
or Another way is click on add library->upload the file
provide Add library with your function name inside the library.
Visbility - Always show
Canvas Page with analytics.
Custom PCF directly downloaded from low code era.
lowcodeera.com Which is place for UI components for Power Apps
ready made components PCF.
Bar Charts components from Lookbook tab.
add code components download and upload code components
create a canvas page and add the component from the components by following the documentation provided by low code era.
OnVisible: create the code required for the kind of UI.
Now click on SideDilag button duplicate it as "Open Dialog"
----------------------------------------------
Show/Hide columns using JS script
----------------------------------------------
Vibe coding With Generative Pages
Model DApps, In order to make more customizable like canvas UI we can do it.
We can bring modern UI views,
example
When click on any card, we can change/update the values in UI
Add Filter based on needs in UI.
how to implement?
Generative AI has capability with prompt and we can create it.
PreReq:
Wee need env should be in US tenancy.
We need to activate a preview feature first.
IT Support Central is a solution ,
IT Support Desk Hub is MD app
Enable generative AI feature in admin center.
admin.powerplatform.microsoft.com
Go to Manage->Envi->Power platform prod Training which is Prod env
->Region should be in US tenancy.
->Settings->Product->Features->Copilot enable it.
allow uses to analyze data using AI-Powered chat expirence
Open MD app
Go to solution ->open MD app -> Open support ticket
Native support ticket page available in the app which I don't like the UI.
which old type page.
We need to create using Vibe coding.
+Add Page
Describe the page.
When every you want vibe code, based on max 6 tables it can create. more than 6 table currently not supporting.
in order to create card layout with title,priority, status, who is created, how long queue
In the prompt box "Add table" list the tables of your solution.
max it can show 6 tables as limitation.
Choose support request table
You can see the describe or understanding your prompt.
Agent thoughts it will show you on the fly.
I want to add filter . Show some sort of priority, functionality like model popup. We can see the behind react code.
Additional prompt we can add
Remove ticket number from the popup. Also remove Assigned To column as well from the model popup. Also add some icon in the card so user will know this is clickable
-----------------------------------------------------------------


Comments
Post a Comment