Power Platform Deployment Pipeline - reading blog
https://www.matthewdevaney.com/the-complete-power-platform-pipelines-alm-setup-guide/
https://www.matthewdevaney.com/the-complete-power-platform-pipelines-alm-setup-guide/create-power-platform-environments-for-dev-test-prod/
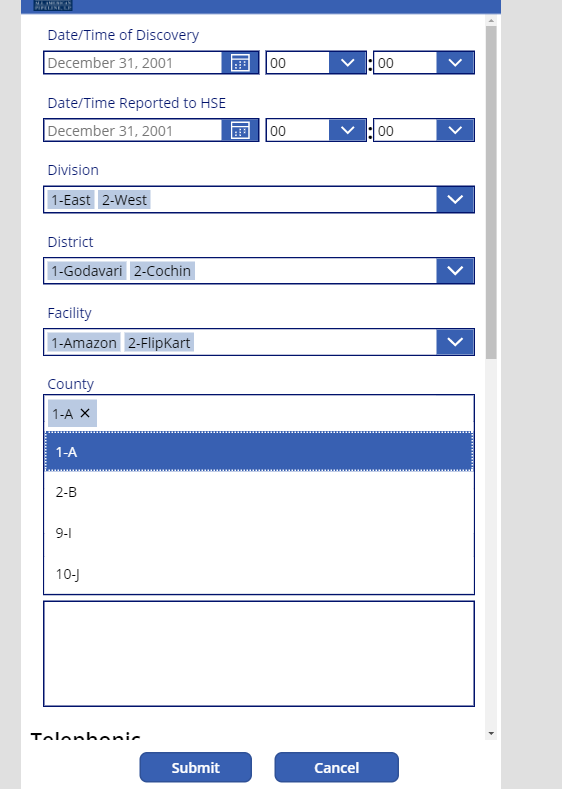
Create an Environement from PP admin center
For Dev env add suffix xyz(Dev) for understanding purpose
choose type as Sandbox for development env
add dataverse to store data(Yes)
Setup for Test and Prod as well. Make sure enable it as managed environment.
Test and production environments are known as target environments. All target environments are required to be managed environments to use Power Platform Pipelines.
Test env type should be sandbox
Prod env type should be production
-----------------------------
https://www.matthewdevaney.com/the-complete-power-platform-pipelines-alm-setup-guide/install-power-platform-pipelines-in-the-host-environment/
Install Power Platform Pipelines In The Host Environment
Open The Environments Menu In Power Platform Admin Center
To create a host environment for the Power Platform Pipelines application go to the Power Platform Admin Center. Then open the Environments menu by selecting the option Mange > Environment and press the New button.
Configure The Power Platform Pipelines Host Environment
In the New Environment menu choose the following setup options:
- Name – PP Pipelines Host
- Type – select Production
- Add a Dataverse datastore – Yes
Install The Power Platform Pipelines App
Now that the host environment is setup the Power Platform Pipelines application must be installed. In the Power Platform Admin Center go to Manage > Dynamics 365 Apps. Choose Power Platform Pipelines and select Install.
Choose the Power Platform Pipelines host environment and press the Install button.
In the PP PipelinesHost, pipleline evn we can see it is installing.
Verify The Model-Driven App Installation In The Host Environment
After a few minutes the Power Platform Pipelines installation will complete.
Go to the Power Platform Pipelines Host environment and look for a model-driven app named Deployment Pipelines Configuration. This is the application used to create and manage pipelines.
------------------
Import The Sample Solution Into The Dev Environment >>
This Power Platform Pipelines tutorial uses a sample solution with a canvas app, a model driven app, a flow, connections references, environment variables and tables. Rather than build them from scratch, we will import them into the development environment. That way we can keep focused on learning Power Platform application lifecycle management.
Download the Currency Exchange Sample solution from github
Import The Solution Into the Development Environment
Open the Development environment in Power Apps and go to the Solutions menu. Press the Import solution button.
Env name left corener is ALM Tutorial (Dev)
Configure The Connection References
The sample solution contains two connection references used in a Power Automate flow. One for Dataverse and another for Outlook. Wait for the green checkmark to appear beside each connection reference. If it does not appear, press the three dots to troubleshoot the issue. Then press the Next button.
Set The Environment Variable Value
The sample solution also contains an environment variable for Email Notifications. The email address in this environment variable will receive email. Set this value to your personal email then press Import.
The sample solution will begin importing.
After a few minutes the import process will complete.
Review The Sample Solution In The Development Environment
Open up the sample solution in the development environment and get to know its components.
Note that the environment variable is set to the value we defined during the import process.
And the connection references for Dataverse and Outlook have been configured with a connection.
To see the connections used in the connection references go to the Connections menu.
-----------------------------------
Setup A Power Platform Service Account >>
A Power Platform Service Account is a Microsoft 365 account used by the system to perform background operations. Service Accounts often have an elevated security role like System Administrator. By using a Service Account, Power Platform Pipelines can deploy solutions as the service account instead of the user who started the deployment. This avoids giving the user system administrator privileges to the target environment
Add A New User In The Microsoft 365 Admin Center
To create a Power Platform Service Account go to the Microsoft 365 Admin Center. Then browse to Users > Active Users and press the Add A User button.
Set the first name and last name to Service Account. And choose a username such as powerplatformserviceaccount@domain.com. Then press the Next button.
Assign Power Apps And Power Automate Licenses
The Power Platform Service Account must have premium licenses assigned to it. Apply a Power Apps Premium license and a Power Automate license. Then press Next.
Grant The System Administrator Role
The Power Platform Service Account must be given a System Administrator role in all environments: Development, Test, Production and the Pipelines Host environment. For each environment, go-to the landing page and open the Users menu.
Add the Power Platform Service Account as a new user.
Assign the System Administrator role to the Service Account.
------------------------------------------------
Start A New Azure DevOps Project >>
An Azure DevOps project must be setup to take advantage of Power Platform Git Integration. Then we can add an Azure Repo to the DevOps project to store code in Git. An Azure DevOps license is free for the first 5 users in an organization and only takes a few minutes to setup.
Create A New Azure DevOps Organization
Azure DevOps can be accessed through the Azure Portal. Open the Azure Portal and search for Azure DevOps organizations.
An Azure DevOps organization is needed to create Azure DevOps projects. Press the My Azure Dev Ops Organizations page.
Press the Create new organization button or select an existing organization.
If starting a new organization, select a URL and a host country. Then press Continue.
Setup An Azure DevOps Project
On the Azure DevOps home page, select your organization once again, and fill-in the create a project menu. Choose the name ALM Tutorial Project. Set visibility to Private and version control to Git. Then press the Create project button.
The new project will appear inside the selected organization. Open the project.
he project landing screen appears with a welcome message.
------------------------------------------------
Configure Development And Target Environments >>
https://www.matthewdevaney.com/the-complete-power-platform-pipelines-alm-setup-guide/create-a-power-platform-pipeline/
Power Platform Pipelines must be connected to a development environment and one or more target environments. A development environment is where makers develop solutions. Target environments are where solutions get deployed to. For example, the test and production environments. Before creating the pipeline we will add environments to the pipeline configuration app.
From the PP Pipelines Host environment,
Under ->Apps
Click on our app "Deployment Pipeline App"
Open The Deployment Pipeline Configuration App
Go to the Power Platform Pipelines host environment and open the Deployment Pipelines Configuration app.
Add The Development Environment To The Pipelines App
First, we will add a development environment. Go to the Environments page and press the New button.
Fill-in the environment details then press the save button. The validation status will switch to pending.
- Name – ALM Tutorial (Dev)
- Owner – set to your own user account
- Environment Type – Development Environment
- Environment ID – the environment ID from the environment’s developer resources menu.
Get The Environment ID From Developer Resources
The environment id is necessary to setup the developer and target environments in Power Platform Pipelines. Go to any environment, press the settings button and select developer resources.
The unique identifier of the environment is shown as Environment ID.
Setup The Test Environment As A Target Environment
Continue on with adding the Test Environment as a target environment. Target environments are environments where managed solutions are deployed to.
Add the environment details then press the save button. Wait for the environment to pass validation.
- Name – ALM Tutorial (Test)
- Owner – set to your own user account
- Environment Type – Target Environment
- Environment ID – the environment ID from the environment’s developer resources menu.
Configure The Prod Environment As A Target Environment
Add a new environment one more time. Supply the Production environment details then press the save button. Wait for the environment to pass validation.
- Name – ALM Tutorial (Prod)
- Owner – set to your own user account
- Environment Type – Target Environment
- Environment ID – the environment ID from the environment’s developer resources menu.
Create A New Power Platform Pipeline
Go to the pipelines host environment and open the deployment pipeline configuration model-driven app.
Browse to the pipelines page and create a new pipeline.
Name the pipeline ALM Tutorial Pipeline. Allow redeployments of older versions. Then save the pipeline.
Link A Development Environment To The Power Platform Pipeline
We want the pipeline to export solutions form the development environment and import them into the test and production environments. Add an existing development environment to the pipeline.
Select the ALM Tutorial (Dev) development environment to the pipeline. We created this record in a previous module of the tutorial.
The ALM Tutorial (Dev) environment now appears in the linked development environments subgrid.
Add A Test Environment Deployment Stage To The Pipeline
The test environment is the first target environment we will add to the Power Platform pipeline. Look for the deployment stages subgrid and press the new deployment stage button.
Setup the test environment deployment stage as follows. Then save and close the stage.
- Name – ALM Tutorial Deployment Stage (Test)
- Owner – your Microsoft 365 account
- Deployment Pipeline – ALM Tutorial Pipeline
- Target Deployment Environment ID – ALM Tutorial (Test)
------------------------------------------------
A Power Platform Pipelines security role is required to create or use Power Platform pipelines if you are not the system administrator. We can assign a user to the deployment pipeline administrators role or the deployment pipeline users role indirectly through security teams. Security teams are found in the pipelines model-driven app.
Open The Pipelines Model-Driven App
Go to the pipelines host environment and open the deployment pipeline configuration model-driven app.
Assign A User To The Deployment Pipeline Administrator Role
The deployment pipeline administrator role gives users access to the deployment pipeline configuration app and the ability to create & edit pipelines in the host environment. To assign a new pipelines administrator, open the security teams page and select deployment pipeline administrators.
Press the add existing user button in the Team members subgrid.
Choose the user you want to become a Power Platform pipelines administrator. Then press the Add button.
The user appears in the team members subgrid.
Add Users To The Deployment Pipeline Users Role
The deployment pipeline user role gives the user an ability to run a pipeline that is shared with them. To add a new pipelines user, go to the security teams page and select deployment pipeline users
----------------------------------------------
Deploy The Solution To The Test Environment With Pipelines
Go to the development environment and open the solution you want to move to the test environment.
Select the pipelines menu item from the left navigation.
On the Pipelines page, select the ALM Tutorial Pipeline. Then press the Deploy here button.
Choose to deploy the solution now, then press the Next button.
Configure Connection References And Environment Variables
The sample solution contains two connection references used in a Power Automate flow. One for Dataverse and another for Outlook. Wait for the green checkmark to appear beside each connection reference. If it does not appear, press the three dots to troubleshoot the issue. Then press the Next button.
The sample solution also contains an environment variable for Email Notifications. The email address in this environment variable will receive email. Set this value to the tester’s email address then press Next.
Write Deployment Notes To Explain Solution Updates
Each deployment will update a the solution in the target environment. To make it easier to track changes it is important to write good deployment notes. Explain the difference between each deployment as opposed to giving an overview of the entire solution. Do not use AI generated deployment notes.
Press the deploy button once finished.
Wait For The Test Stage Deployment To Complete
Power Platform Pipelines will begin to the deploy the solution to the test environment. This operation takes a few minutes to complete.
When the deployment successfully completes the last installed version and the deployment date appear in the test stage.
Review The Deployment To The Test Environment
Go to the test environment and open the solutions menu to check on the deployment of the sample solution. Look under the managed solutions tab.
It is recommended to verify the deployment by opening applications and automations to ensure they are working in the new environment.
View The Pipeline Run History
To look at the run history of the Power Platform Pipeline, go to the host environment and open the Deployment Pipeline Configuration app. Then go to the run history page and select a run.
Get The Managed & Unmanaged Solution ZIP File
During manual exports we download a solution zip file to our machine then import it into the test environment. This gives us a valuable copy of the solution zip file which we can use in redeployments. The Power Platform Pipeline also stores the solution zip files as solution artifacts. Go to the solution artifacts page and open an artifact.
The managed and unmanaged solution zip files are found on the solution artifact details page.
---------------------------------
Deploy A Solution To The Production Environment >>
https://www.matthewdevaney.com/the-complete-power-platform-pipelines-alm-setup-guide/deploy-a-solution-to-the-production-environment/
Once testing is completed we can use Power Platform Pipelines to move the managed solution to the production environment and go-live. Using a pipeline ensures the deployment to production is performed in a consistent manner. And it forces all changes to pass through the test environment first.

Comments
Post a Comment